Effie's Food Corner

Step into my kitchen!

On vacation for 3 weeks May 8, 2014

Filed under: Recipes — lillagreca @ 6:30 pm

Hello everyone!
Just wanted to let you all know, that I won’t be posting anything for the next 3 weeks because I’m on vacation in the States and I really need to relax and unwind after the tough year I had. But I will be back with new recipes in June! 🙂

-Effie


Mini Lemon Meringue cupcakes April 27, 2014

Filed under: Desserts,Recipes — lillagreca @ 6:52 pm
Tags: , , , , , , , ,

If you want something tangy and sweet that makes your tastebuds dance then these bite size beauties are what you need! They are easy to make and they look fancy and pretty too!


SONY DSC

(24 mini cupcakes or 12 standard cupcakes or 6 jumbo cupcakes)

Ingredients:


Cupcakes:

2.5 dl (1 c) flour
1.5 tsp baking powder
1.25 dl (½ c) granulated sugar
100 g (3 ½ oz) butter (softened)*
2 eggs
2 tbsp milk
* To soften butter, microwave it on the defrost setting for a total of 15-20 seconds, 5 seconds at a time, turning the butter after each 5-second interval.


Filling:
Lemon Curd (you can use store bought, or make your own from scratch. I used the recipe below that I found on the BBC Food website. It’s easy to make and very tasty!)

http://www.bbc.co.uk/food/recipes/lemon_curd_68499


Meringue frosting:
egg whites from 3 large eggs
1.25 dl (½ c) granulated sugar
1 tbsp powdered sugar


For the cupcakes:
1. Preheat oven to 200° C (390° F).
2. Grease a mini muffin pan or line with mini cupcake liners.
3. In a medium bowl, combine flour and baking powder.
4. In another bowl, beat the butter and sugar until creamy.
5. Beat in the eggs (one at a time) and the milk.
6. Add the dry ingredients and mix until just incorporated.
7. Put mixture into the muffin pan, filling each cup about ¾ full.
8. Bake for 10-12 minutes or until a toothpick inserted into the center of a cupcake comes out clean.
9. Allow cupcakes to cool (25-30 minutes) before filling them.
10.To fill the cupcakes, cut out the center of each cupcake using a paring knife and cutting at an angle so that the “lid” looks like a cone..
11.Fill the center with lemon curd and put the “lid” back on.


For the frosting:
1. In a large metal or glass bowl, beat the egg whites on medium speed until soft peaks form.
2. Add the sugars and beat on high speed until stiff peaks form.
3. Transfer the meringue carefully into a piping bag and pipe on top of each cupcake.
4. Bake at 200° C (400° F) for 5-7 minutes or until meringue is golden brown.


SONY DSC SONY DSC SONY DSC


Piña Colada Cheesecake

Filed under: Desserts,Recipes — lillagreca @ 5:10 pm
Tags: , , , , , , ,

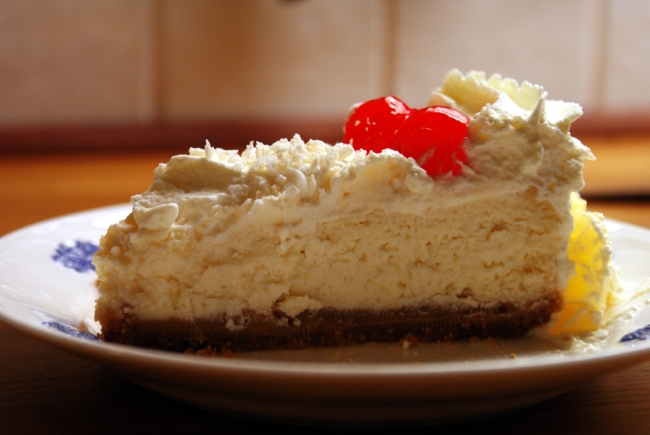
I love cheesecake and I love piña coladas so I decided to combine the two and the result was this rich and creamy cake with a wonderful tropical flavor.. You can make this all year round.. Make it in the winter when you’re missing those lazy days on the beach or in the summer for a refreshing treat!

Image

(10-12 servings)


Ingredients:

Crust:
85 g (3 oz) butter
160 g (5.7 oz) digestive cookies (or graham crackers), crushed
1 tbsp granulated sugar

Filling:
700 g (25 oz) cream cheese, softened
1.25 dl (½ c) granulated sugar
5 large eggs
1 can (425 g/ 15 oz) cream of coconut (such as Coco Lopez)
0.8 dl (⅓ c) coconut rum (such as Malibu)
4 tbsp pineapple juice

Topping and garnish:
5 dl (2 c) whipping cream
3-4 tsp sugar
225 g (8 oz) canned pineapple rings in own juice
shredded coconut (optional)
maraschino cherries (optional)

For the crust:
1. Preheat the oven to 175° C (350° F)
2. Line the base of a 23 cm (9 in) springform pan with parchment paper.
3. Melt butter in a small saucepan and stir in cookie crumbs and sugar, mixing well.
4. Press mixture into bottom of pan making sure it’s even and covers the entire base of the pan.
5. Bake in the middle of the oven for 10 minutes.
6. Set aside to cool while preparing the filling.

For the filling:
1. Combine cream cheese and sugar using a rubber spatula or wooden spoon until creamy and well-blended. Do not whisk or beat the cream cheese and sugar as this will result in too much air in the batter and cheesecake should be rich and dense, not light and fluffy..
2. Add the eggs, one at a time, gently whisking or beating them into the mixture. Again, do not whisk or beat at high speed as this will result in an airy batter.
3. Add cream of coconut, rum, and pineapple juice.. Whisk or beat gently until well-blended.
4. Carefully grease the sides of the the springform pan and place the pan on a cookie sheet or roasting pan.
5. Pour the filling into the springform pan, covering the cooled cookie crust and bake in the middle of the oven for about  1 hour and 30 minutes.
6. The cake will be wobbly and jiggly when it comes out of the oven, but it will sink and set a few minutes later.
7. Cool for 1-2 hours on wire rack. (If the top of the cake is too brown [some ovens have “hot spots” and can brown or even burn cakes… ] then just “peel” off the brown part with a knife after it has cooled .. 🙂 )
8. Remove the springform ring (run a knife around the sides between the cake and the ring first, to make sure that the cake isn’t stuck to the ring) , cover and chill in the refrigerator for at least 8-10 hours.

For the topping and garnish:
1. Beat cream with sugar until soft peaks form and it’s thick  and runny… Start off with a low setting on the beater and increase when the cream starts to thicken.. Do not overbeat or your whipped cream will turn into butter!
2. Spread the whipped cream frosting evenly on the cake and garnish with pineapples, shredded coconut, maraschino cherries and some more whipped cream.


I’m back

Filed under: Recipes — lillagreca @ 4:21 pm

Hello again, everyone! I am finally back after a year and a half… Most of you probably thought that I had abandoned my blog, but surprise surprise! 🙂 I didn’t even realize that it had been so long, but I didn’t really have a choice. I have been very sick and everything was a struggle so there was no energy, motivation, or inspiration left for cooking and baking…  I had other things to focus on. I am better now and I’m slowly starting to feel like my usual self..  So I have 2 recipes for you today that I am going to post shortly..  🙂


Oven-baked broccoli, potato, mushroom, bacon and Cheddar omelette August 16, 2012

Omelettes are very versatile and satisfying, plus they will feed an army! There are so many different fillings and toppings that you can experiment with…..the flavor combos are endless! This particular omelette has my favorite ingredients: broccoli, potatoes, mushrooms, bacon, and cheese!!  Yum! 🙂


(6 servings)

Ingredients:


1 head of broccoli (trimmed and cut into florets)
250-300 g (9-10 oz) bacon (cut into thick strips or cubes)
3-4 medium sized potatoes (peeled and cubed)
1 large bell pepper or 2 medium ones (any color) (finely chopped)
250 g (9 oz) fresh mushrooms (sliced)
1 large yellow onion (finely chopped)
350-400 g (12 – 14 oz) Cheddar cheese (shredded)
1-2 tbsp corn oil
12 eggs + 2 dl (¾ c) milk
1 tsp salt
0.5 tsp ground black pepper
1 tbsp fresh or frozen parsley (finely chopped)
1 tbsp fresh or frozen chives (finely chopped)


1. Heat oven to 200 C (400 F)
2. Bring a pot of water to a boil and cook the broccoli for 3-4 minutes. It should have a nice bright green color when it’s done.
3. Heat corn oil in a large skillet and fry potatoes until golden brown.
4. Put onion, bell peppers, and mushrooms in skillet and cook until tender. Set aside.
5. Cook bacon in the same oil until it is light brown, but not crispy, otherwise it will burn in the oven…
6. Drain excess oil and fat.
7. Put the potatoes, onion, bell peppers, mushrooms, broccoli, and half of the bacon in a 30x25x5 cm  (12x10x2 in) baking dish or baking pan.
8. Beat the eggs with milk, salt, pepper, and herbs.
9. Add half of the shredded Cheddar cheese to the egg mixture.
10. Pour egg mixture over the ingredients in the baking dish and top with the rest of the bacon..
11. Bake for 25 minutes.
12. Take the omelette out of the oven, top with the rest of the Cheddar cheese and bake for an additional 15-20 minutes (depending on your oven and how crispy you want your omelette to be)


(Tip: You can use other cheeses such as Gouda or Edam or combine two or three different cheeses.)


Mini meatball & potato soup April 22, 2012

Filed under: Dinner,Lunch,Main dishes,Recipes — lillagreca @ 12:18 pm
Tags: , , , , , , ,

Soup is such a versatile meal and usually very easy to prepare since it virtually cooks itself…You can easily substitute one ingredient for another or add more or less of a certain ingredient…it’s all up to you really… I enjoy experimenting in the kitchen and soup is a wonderful way of combining different ingredients, and I’m almost always pleased with the results. In this case I took your basic tomato/vegetable soup and added mini meatballs to it..I love meatballs, and I love soup…perfect!

(8 servings)


Ingredients:

500 g (1 lb) ground beef
4 medium sized potatoes (peeled and cubed)
2 ribs of celery (peeled and finely chopped)
2 large yellow onions (diced)
2 l (2 qts) water
5 dl (2 c) frozen peas
300 g (10 oz) canned corn (drained)
400 g (14 oz) canned mixed beans (rinsed and drained)
500 g  (18 oz) strained tomatoes
3 tbsp concentrated beef stock
2 tbsp butter
1 tbsp fresh or frozen parsley (finely chopped)
1 tbsp fresh or frozen chives (finely chopped)
1 tsp garlic powder
2 tsp paprika
1 tsp salt
1 tsp ground black pepper


Garnish/Toppings:

1 tsp fresh or frozen chives (finely chopped)/serving
1 tbsp crème fraîche or sour cream/serving


1. In a large pot over high heat, bring water, butter and stock to a boil.
2. Add potatoes and reduce heat to medium.
3. Prepare the meatballs by mixing the ground beef with paprika, garlic powder, salt and pepper.
4. Using your hands, roll the meatballs into 2.5 cm/1 in balls.


5. Put the meatballs into the pot along with the onions, celery, peas, corn, beans, and strained tomatoes.
6. After 20-25 minutes, add herbs and give the soup a gentle stir.
7. Cook for 20-25 more minutes or until the potatoes are tender and the meatballs are cooked through.
8. Serve with a dollop of crème fraîche or sour cream in the middle and chives on top.

(Tip: Don’t like beans or peas? Substitute them with more potatoes. )


Thai-style salmon in coconut sauce with vegetables April 20, 2012

Well, it’s been a while again…I had some major problems with my computer, but I’m back on track now!  🙂

Anyone in the mood for Asian food? Instead of calling your local take out place, you can whip this meal up in no time, and it looks, tastes, and smells great! Plus it’s healthier and MSG-free… Break out your chopsticks everybody!


(6 servings)

Ingredients:


500g (18 oz) skinless, boneless salmon fillets (cut into bite size pieces)
400 g (14 oz) frozen stir fry vegetables (thawed)
500 ml (17 fl. oz) coconut milk
1 lime (zest + juice)
2 tbsp tomato paste
2 tbsp concentrated seafood stock
1 tsp paprika
2 tsp curry powder
0.5 tsp chili powder
0.5 tsp salt
0.5 tsp black pepper


Garnish:

1 tsp fresh or frozen coriander leaves (finely chopped)
1 tsp ginger root (grated or very finely chopped)
1 red chili pepper (seeded and finely chopped)


1. In a sauté pan over medium-high heat, bring coconut milk, tomato paste, seafood stock, lime zest, paprika, curry powder, and chili powder to a boil.
2. Reduce the heat to medium-low and give the sauce a good stir.
3. Add the salmon and simmer for 5-7 minutes.
4. Add salt, black pepper, lime juice, and thawed vegetables.
5. Cook for a few more minutes, stirring gently, until the vegetables are heated through.
6. Serve with noodles (or jasmine rice if you prefer).
7. Garnish with coriander, ginger root, and chili.


Peanut Butter Chocolate-Chocolate Chip Cupcakes with Nutella Frosting February 28, 2012

Do you like chocolate? Do you like peanut butter? Do you like Nutella? If you answered yes to all three questions, then this is the cupcake for you!! Imagine a super chocolaty, peanut buttery and heavenly cupcake topped with a creamy Nutella frosting! Well, what are you waiting for…Make a batch and indulge!  Yummy!! 😉

(12 cupcakes)


Ingredients:

Cupcakes:
4 dl ( 1 ¾ c) flour
1.75 dl (¾ c) sugar
4 tsp baking powder
2 tsp vanilla powder
2 pinches of salt
7 tbsp unsweetened cocoa powder
175 g (6 oz) semi-sweet chocolate chips
2 dl (¾ c) peanut butter
1 egg
3 dl (1 ⅓ c) milk
1 dl (3.5 fl oz.) corn oil
0.5 dl (¼ c) chocolate syrup


Nutella frosting:
200 g (7 oz) 
Nutella
200 g (7 oz) 
cream cheese


For the frosting which can be prepared the same day or one day in advance:
1. 
Beat cream cheese until soft.
2. 
Add Nutella to the cream cheese and beat until creamy and well incorporated.

For the cupcakes:
1.
Preheat oven to 200 C (390 F).
2.
Grease a muffin tin or line with paper muffin cups.
3.
In a large bowl, combine flour, sugar, baking powder, vanilla, salt and cocoa powder.
4.
In another bowl, beat egg, milk, oil, chocolate syrup, and peanut butter for a minute or two.
5.
Pour mixture into the bowl with the dry ingredients and stir until batter is smooth. Do not overmix…
6. 
Spoon batter into the muffin tin, filling almost all the way to the top.
7.
Sprinkle chocolate chips on top and press them down into the batter a bit by using a toothpick or a teaspoon…
8.
Bake for approximately 15 minutes or until a toothpick inserted into the center of a cupcake comes out clean.
9.
Allow cupcakes to cool for 10-15 minutes before frosting them.
10.
Frost the cupcakes with the Nutella frosting and decorate with sprinkles or white chocolate chips.


Bananaberry Crumb Pie November 16, 2011

Filed under: Desserts,Recipes — lillagreca @ 12:40 am
Tags: , , , , , , , ,

November is one of the darkest months of the year, and with winter just around the corner, it’s the perfect time to curl up on the couch and watch a good movie with a nice, hot beverage of your choice and something good to eat. Why not treat yourself to some warm bananaberry crumb pie with a couple of scoops of vanilla ice cream? It will make you think of summer and put a smile on your face! 🙂


(8 servings)


Ingredients:


Crumb Topping:
2.5 dl (1 c) flour
2.5 dl (1 c) granulated sugar
125 g (4.5 oz) butter


Filling:
3 medium-sized ripe bananas
350 g (12 oz) frozen strawberries,thawed or 350 g (12 oz) fresh strawberries + 1.5 tbsp water
1.75 dl (¾ c) granulated sugar
0.5 dl (¼ c) brown sugar
2 tbsp cornstarch
0.25 tsp ground cardamom (if you can’t find this spice, nutmeg is the next best thing, but cardamom is better)
2 tbsp freshly squeezed orange juice


1. Preheat oven to 225 C (435 F).
2. Cut the butter into small pieces (1 cm/0.5 in) and set aside for a while.
3. Mash the strawberries with a fork and add the sugars, cornstarch, cardamom (or nutmeg), and orange juice, mixing well.
4. Peel and slice the bananas into “coins”. To prevent the bananas from turning brown while you’re slicing them, sprinkle them with a few drops of lemon juice.
5. Add the flour and sugar to the butter and using either a fork or a U-shaped pastry cutter, cut butter into flour and sugar until the mixture is crumbly. The crumbs should be the size of peas if you want a crunchy granola/müsli type texture, but if you’re like me and prefer a crispy and candy-like topping then continue cutting until the crumbs are very small.
6. Fill a 25 cm (10 in) shallow pie pan with the sliced bananas and pour the strawberry mixture over them. It should look like this:


7. Cover with the crumb topping.
8. Bake 20 – 25 minutes depending on your oven. (I have an electric oven and it takes exactly 20 minutes.) The pie is ready when the crumb topping is golden brown and the filling is bubbling through the topping.
9. Serve warm with vanilla ice cream.


Beef and Veggie Skillet November 12, 2011

Filed under: Brunch,Dinner,Lunch,Main dishes,Recipes — lillagreca @ 6:41 pm
Tags: , , , , , , , , ,

I’m finally back after a very long absence due to many different factors, which I won’t bore you with…With me I have a whole bunch of recipes that I’m going to share with you starting today! 🙂 This recipe is the result of a game I like to call “Effie’s Food Roulette”, which means that  I look in the fridge/freezer/cabinets and pick out a few ingredients that I think go well together and make something out of them! It’s a very easy meal to prepare and it tastes great too!  You can make this for lunch, brunch or dinner and serve it with rice, pasta or potatoes…It will feed a small army (or 6 people….😀)

(4-6 servings)


Ingredients:


500 g (1 lb) ground beef
1.25 dl (½ c) dried red lentils (rinsed and sorted through)
1 large red, yellow, or green bell pepper (diced)
1 large yellow or red onion (finely chopped)
1 300 g (10 oz) can of corn (drained)
1 300 g (10 oz) can of sliced mushrooms (with liquid)
1 tbsp olive oil
1.25 dl (½ c) vegetable stock
2 tbsp tomato paste
0.5 tsp dried oregano
0.5 tsp dried thyme
1 tbsp fresh or frozen chives (finely chopped)
1 tsp salt
0.5 tsp ground black pepper


1. Bring a small pot of water to a boil, add 1 tsp of salt, and cook the lentils for 5 minutes or until tender. Be careful not to overcook them, they will turn to mush.
2. Rinse lentils under cold water, drain, and set aside.
3. Heat the oil over medium-high heat in a large nonstick skillet.
4. Add the beef, breaking it up into smaller pieces with a wooden fork, a spatula with holes in it, or a potato masher.
5. When the meat starts to brown, add the bell pepper and the onion and cook until tender.
6. Add the mushrooms with liquid, the vegetable stock, tomato paste, dried herbs, salt, and pepper.
7. Give it a good stir and simmer over medium heat for a few minutes until the liquid has reduced and thickened slightly.
8. Add lentils, corn, and chives and cook over low heat until heated through, a couple of minutes.
9. Serve with rice, pasta or potatoes (fries, wedges, mashed, etc.. this goes well with everything.)


(Tip: The mushrooms can be omitted, substitute the mushrooms with more bell pepper, corn or lentils and the mushroom liquid with 1.25 dl (½ c) water.)